Frequently asked questions
How thick should a shed pad be?
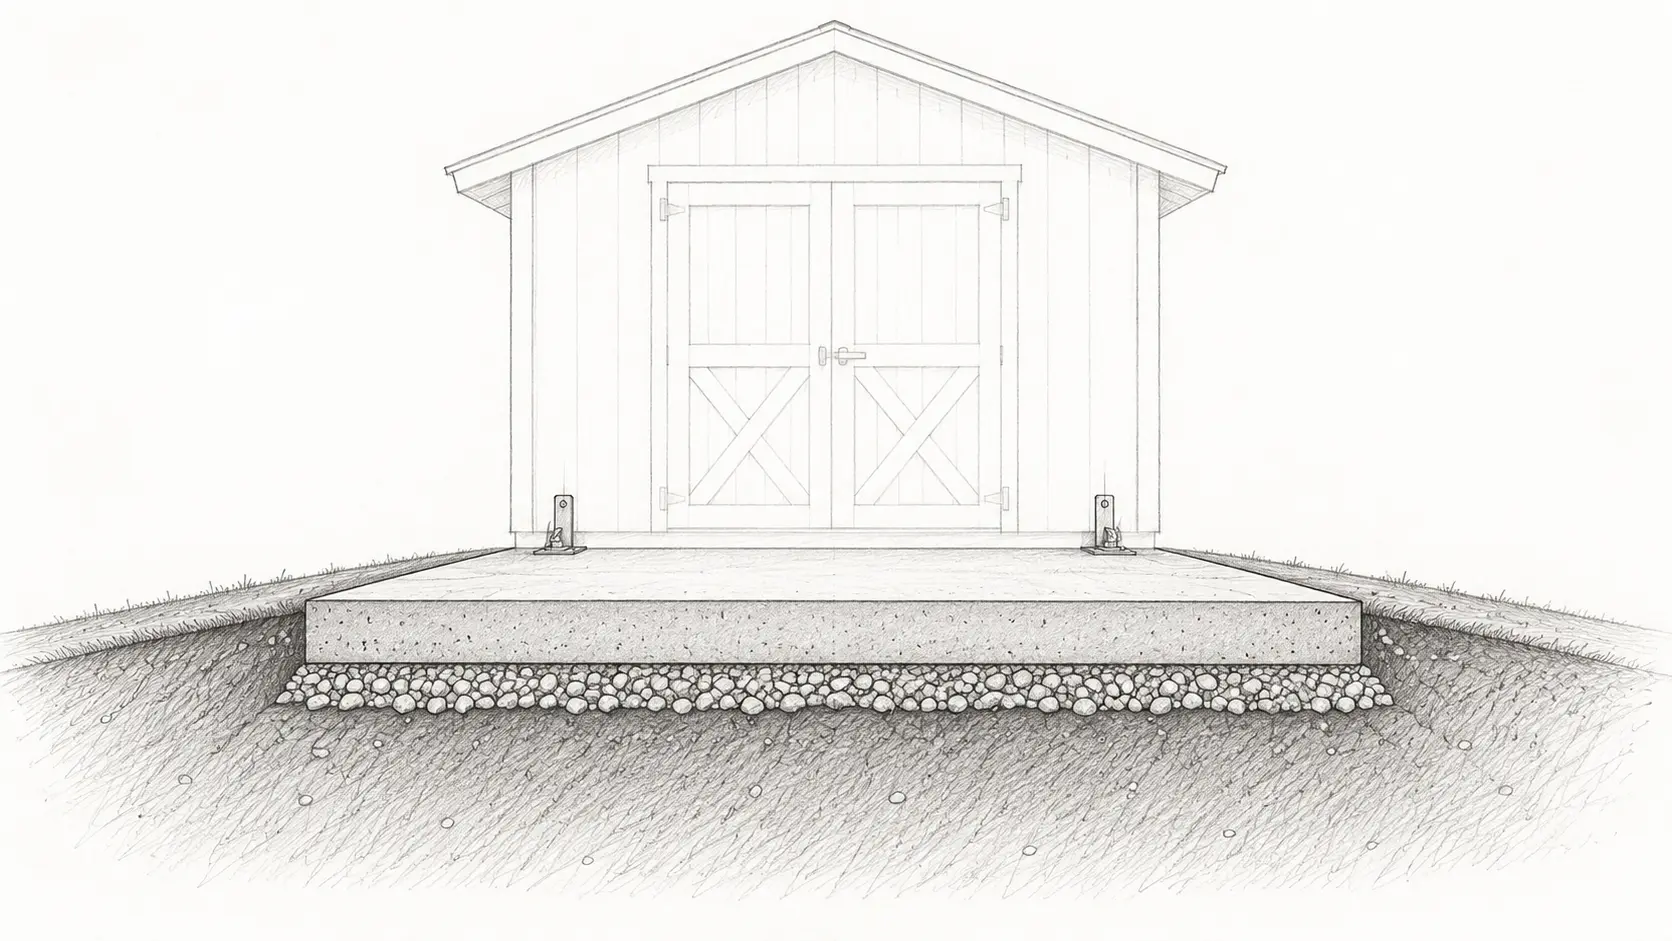
Four inches over a compacted 4-inch base suits most light-storage sheds. Step up to 5–6 inches with rebar for heavy equipment, tractors, or large buildings, and add thickened edges or piers on frost-prone sites.
Does a shed pad need rebar?
Welded mesh or synthetic fibers control shrinkage cracking on a small light-storage pad. A #3 or #4 rebar grid is worth adding for heavier loads or larger pads where settlement and cracking matter more.
Is it cheaper to use bags or ready-mix for a shed pad?
Below about 0.75 cubic yard, bagged concrete is usually cheaper. Above 1.5 cubic yards, ready-mix wins even with a short-load fee. Most single-shed pads fall between those points, so it is worth pricing both.
Get the required foundation plan first
Use the shed manufacturer’s foundation drawing or the project plans to identify slab length, width, edge condition, anchor locations, and required clearances. Nominal building dimensions can describe roof or wall size rather than the concrete footprint.
The calculator’s default pad is 10 × 12 ft at 4 inches thick over a 4-inch gravel base. It is a planning starting point for a light slab, not a universal shed foundation.
Know when a floating pad is not enough
Small light-storage buildings may use a simple slab on prepared support. Larger sheds, masonry, vehicle storage, tall walls, heavy equipment, frost-prone sites, or local permit thresholds can require thickened edges, strip footings, piers, or a frost-protected system. Calculate those foundation elements separately.
Prepare for water before weight
Strip organic soil, correct soft areas, and establish drainage away from the pad. Place and compact the specified base to a uniform finished elevation. The calculator separates compacted base from loose order volume so delivered material can account for compaction. Dampen the compacted base just before the pour — a dry granular base pulls moisture from fresh concrete and can cause early shrinkage cracking at the bottom of the slab. For most light-storage sheds, 2,500 PSI concrete is sufficient; upgrade to 3,000 PSI for sites with meaningful freeze-thaw exposure or for pads that will support heavy equipment.
A level building may still need the surrounding grade to fall away. Door thresholds, ramps, mower access, and roof runoff should be coordinated before forms are fixed.
Coordinate anchors and edges
Anchor bolts or proprietary connectors need correct edge distance, spacing, embedment, and location. Do not let a generic reinforcement grid interfere with anchors or treat mesh as a substitute for required hold-down design. Mark openings, sleeves, and embedded items on the form plan.
Check frost and permit rules
Local rules may distinguish movable accessory structures from permanent buildings or set size thresholds for permits and foundations. In frost climates, a floating pad may move differently from utilities, steps, or adjacent structures. Verify the accepted foundation type with the local authority before excavation.
Choose the ordering method realistically
A 10 × 12 × 4-inch pad is about 1.48 cubic yards before waste. That is dozens of 80 lb bags and may be near the point where ready-mix is operationally easier, even if a supplier charges a short-load fee. Compare material quantity with crew capacity, mixer output, access, finishing time, and weather.
A two-person crew with a power mixer can place roughly 1 cubic yard of bagged concrete per hour. Above 1.5 cubic yards, mixing time becomes the bottleneck and ready-mix wins even when a short-load surcharge applies — typically around $53 per yard on orders under 10 cubic yards. Begin curing immediately after finishing: a liquid cure-and-seal product applied after brooming is practical on a small pad. Keep the surface damp or covered for at least 7 days before placing the shed.
Shed pad options by load
A floating pad works for most light-storage buildings, but heavier contents and frost-prone sites push toward thicker slabs or footings. Match the section to the building and the climate, and confirm any permit threshold with the local authority.
| Shed type | Slab | Base | Strength |
|---|---|---|---|
| Light storage | 4 in | 4 in | 2,500 PSI |
| Heavy or equipment | 5–6 in | 4–6 in | 3,000 PSI + rebar |
| Frost-prone or large | Thickened edge or piers | Per design | 3,000 PSI |
Step by step: pouring a shed pad
A shed pad is small enough to finish in a morning, which is exactly why base prep gets shortchanged. This sequence keeps the easy job from becoming a settling problem.
- Confirm the footprint. Size the pad from the manufacturer's foundation drawing, not the shed's nominal label, and check for required anchor and edge clearances.
- Strip, grade, and compact. Remove sod and topsoil, slope the surrounding grade to fall away, and place and compact a 4-inch granular base to a uniform elevation.
- Form and thicken the edges. Set braced perimeter forms, add a thickened edge where the building bears heavily, and dampen the base just before the pour.
- Reinforce and mark anchors. Set welded mesh or a #3–#4 rebar grid on chairs in the upper third, and mark anchor-bolt locations so steel does not conflict with hold-downs.
- Place, screed, and finish. Place 2,500–3,000 PSI concrete — a two-person crew mixes roughly 1 cubic yard of bags per hour, while ready-mix wins above about 1.5 yards — then screed, float, and broom for traction.
- Set anchors and joints. Place ½-inch anchor bolts to about 7 inches of embedment while the concrete is plastic, and tool or saw control joints on a larger pad.
- Cure 7 days. Apply a cure-and-seal or keep the surface damp under sheeting for 7 days before setting the shed.
Sources and further reading
Use this guide with the Pour Ready methodology page, the shed manufacturer's foundation instructions, and any permit handouts for accessory structures in your jurisdiction.
- 2021 IRC Chapter 4 Foundations for residential footing and frost-context reminders when a floating pad is not enough.
- National Weather Service for the forecast context used when scheduling a small slab pour.