Frequently asked questions
What is a comfortable riser and tread for concrete steps?
Aim for a 7 to 7.5-inch riser with a 10 to 12-inch tread. Keeping the sum of one riser and one tread between 17 and 18 inches produces a natural, comfortable stride.
Do exterior concrete steps need footings?
In freeze-thaw climates, yes — carry the supporting footings below the local frost line so seasonal heave cannot crack the stairs or pull them away from the house. Mild climates may allow a compacted granular base, but verify locally.
Do concrete steps need rebar?
Many residential codes do not strictly require it for short ground-supported flights, but a #3 or #4 rebar grid at 12–16 inches with 2 inches of cover greatly reduces cracking and is standard professional practice for exterior steps.
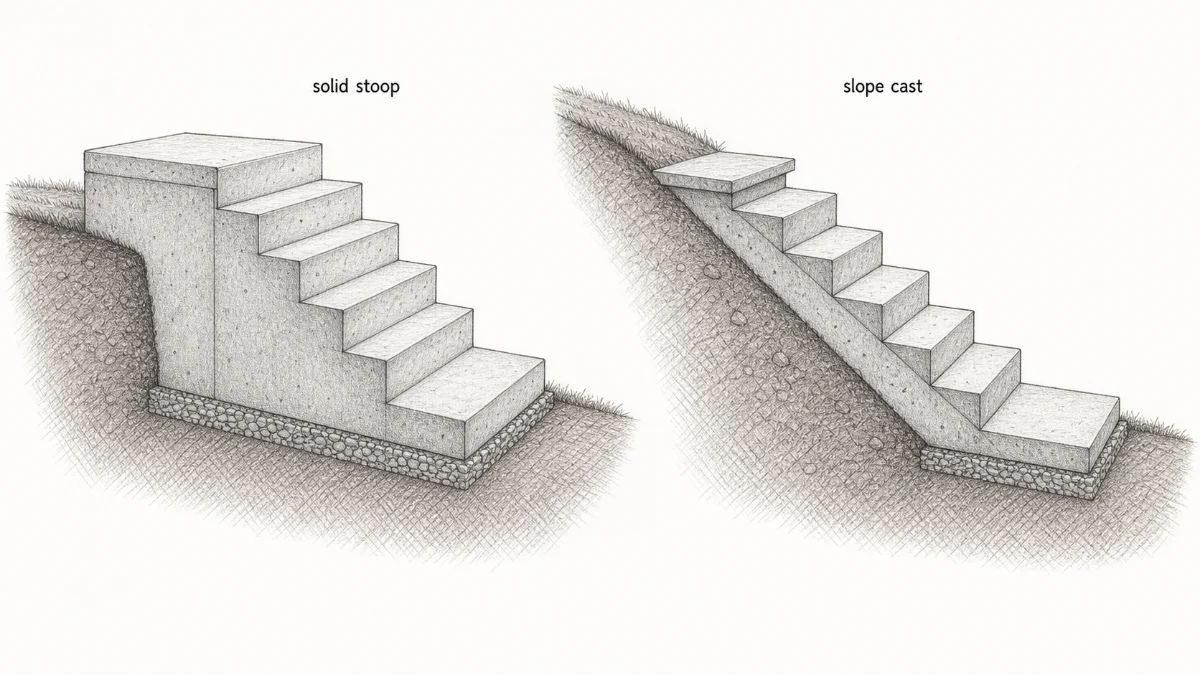
Two constructions, two formulas
Pour Ready separates the supported stair geometries instead of applying one triangular shortcut to every project.
Solid steps or stoop
A solid flight is modeled as stacked step blocks. For N steps, the cross-section follows 1 + 2 + … + N. Optional landing pedestals and paired sidewalls are added, and a measured filler volume can be deducted.
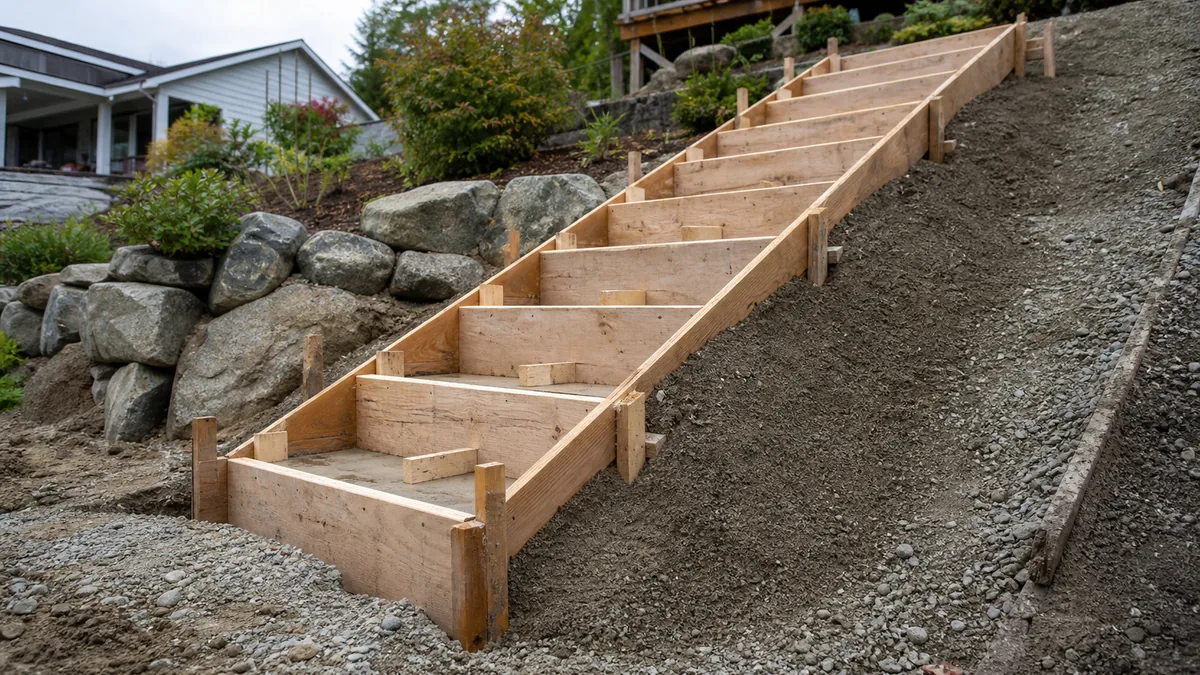
Stairs on a slope or hillside
This mode models a flight cast directly against a compacted earth slope: the slope itself acts as the bottom form, so no elevated formwork is needed. The volume is the inclined throat slab plus the step wedges, with optional angled-riser nosing and optional thin landing slabs bearing on grade at the top and/or the foot of the flight.
Define stair geometry before forms
Confirm total rise, step count, individual riser height, tread run, clear width, landing run, landing width, and finished elevations. Finish materials can change the final riser dimensions. Avoid adjusting only the top or bottom riser after the form layout is set.
A reliable comfort check for exterior stairs: riser height plus tread run should total between 17 and 18 inches. A 7-inch riser with a 10-inch tread totals 17; a 7.5-inch riser with a 10-inch tread totals 17.5 — both produce a natural walking stride. The IRC also requires that the tallest and shortest riser in any one flight differ by no more than 3/8 inch; an error in total-rise measurement is the most common way that tolerance gets violated.
Assemble riser form boards with screws rather than nails — hammering displaces boards from their set positions and can throw the whole form out of level. Add a 2×4 "strongback" across the front face of each riser board to prevent it from bowing outward under concrete pressure. Coat the inside faces of form boards with a release agent or evaporation retardant before the pour so they strip cleanly.
Use code prompts as checks, not approval
The planner compares entries with common IRC 2021 values of 7¾ inches maximum riser and 10 inches minimum tread depth, and notes a 36-inch landing dimension in the direction of travel. Local adoption, amendments, handrails, guards, headroom, width, doors, and accessibility requirements can differ. Verify with the local authority.
Exterior steps need support and drainage
Ground-supported steps require stable compacted support, whether that is a granular base, a verified direct-to-grade subgrade, or an approved foundation strategy. In freeze-thaw climates, exterior stoops may need footings below local frost depth. Isolate the stair from the house or adjacent slab where independent movement is intended. Slope exposed treads and landings to drain away from the building; the project guidance uses about ¼ inch per foot as a planning reminder. The calculator reports loose-order base volume, approximate base weight, and reinforcement quantity when those materials are included in the estimate, and omits base material cost when None / direct to grade is selected.
For reinforcement, use #3 or #4 rebar in a 12 to 16 inch grid pattern and make sure no part of the steel is closer than 2 inches from any concrete surface — this minimum cover protects rebar from corrosion in an exterior environment. Use rebar chairs or concrete dobies to hold the cage at the correct depth before and during the pour; pulling mesh up after the concrete is placed is unreliable and the steel rarely ends up where it needs to be. In freeze-thaw climates, specify at least 3,000 PSI air-entrained concrete (5–7% total air content) for exterior steps, as required by IRC Table R402.2 for moderate and severe weathering regions.
Sidewalls and landings can dominate volume
A full-height landing pedestal or thick sidewalls may use as much concrete as the stair flight. Enter landing height, not just slab thickness, when the landing is supported by a solid pedestal. Select whether walls wrap the landing or follow only the flight. The standard stoop starts with a landing enabled by default and reports its concrete volume separately so it is visible in the takeoff.
Plan for finishing time
Steps have more formed faces, corners, and finishing sequence constraints than a flat slab. Confirm form strength, release, consolidation access, nosing details, crew size, placing method, and curing protection. The calculator does not price step form boards, bracing, stakes, or specialty form hardware; confirm those items from the actual layout. The default 10 percent waste allowance reflects more irregular geometry, but site conditions should determine the final allowance.
Finishing, curing, and long-term care
Pour from the bottom step up to prevent voids accumulating at the base of the flight. Tap the exterior of every form board repeatedly with a light hammer — many quick taps are far more effective than a few hard ones — to vibrate concrete against the forms and drive air pockets to the surface. Keep a small bucket of concrete covered and ready to fill any voids visible after the riser forms are stripped.
After stripping the riser form boards (typically 24 to 48 hours after the pour), fill small surface voids by "stealing the cream" — scraping paste off the surface of adjacent wetter concrete and pressing it into the void. Never add plain water to smooth the surface; the extra water dilutes the paste and leads to spalling in freeze-thaw conditions.
Apply a broom finish to every exposed tread before the concrete stiffens. A smooth-troweled finish is dangerously slippery when wet. Use an edging tool to round the leading edge of each tread to prevent chipping. Apply an acrylic cure-and-seal product immediately after brooming, or keep all surfaces damp under wet burlap or plastic sheeting for at least 7 days. Inform anyone using the stairs to avoid deicing salts for at least two full years after placement — salt accelerates surface scaling on fresh concrete. Use sand for traction instead.
Stair dimensions at a glance
Comfortable, code-compliant stairs come from a small set of numbers that must hold across the whole flight. The values below are the common IRC 2021 residential checks; commercial work under the IBC is stricter, and local amendments always govern.
| Dimension | IRC residential | Why it matters |
|---|---|---|
| Maximum riser height | 7¾ in | Taller risers cause trips and fail inspection. |
| Minimum tread depth | 10 in | Shallow treads do not hold a full foot. |
| Riser + tread (comfort) | 17–18 in | Produces a natural walking stride. |
| Riser/tread uniformity | ≤ 3/8 in variation | Uneven steps are the leading trip hazard. |
| Minimum landing depth | 36 in | Required where a door or flight change occurs. |
| Handrail required | 4 or more risers | Per IRC R311.7.8. |
Step by step: building exterior concrete steps
Exterior steps are unforgiving — every riser must match, the structure must resist frost, and the surface must shed water and stay non-slip. This sequence reflects QUIKRETE, Family Handyman, and IRC field practice.
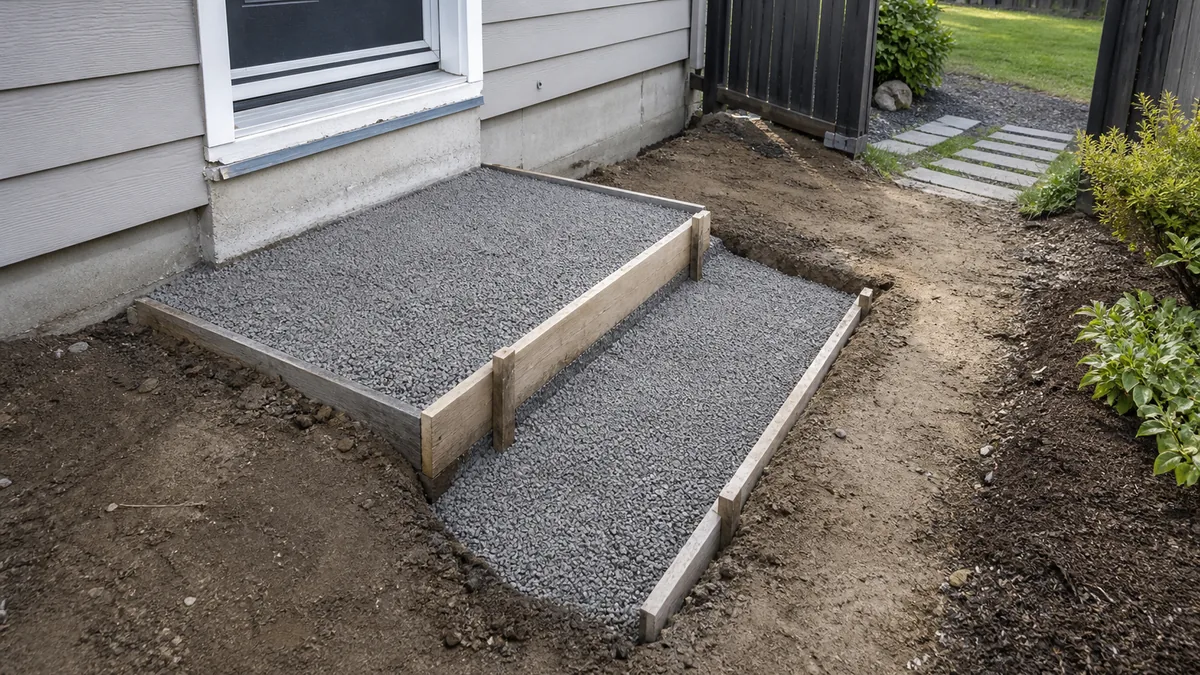
- Calculate the layout. Measure total rise from finished floor to finished floor and divide by a target riser of 7 to 7.5 inches to set the riser count. Use 10–12-inch treads, keep riser plus tread at 17–18 inches, and pitch treads about ¼ inch per foot (2%) away from the house.
- Excavate and base below frost. Strip organic soil about 6 inches down and carry footings below the local frost line (often 42–48 inches in cold climates) to stop heave. Compact the subgrade and add 4–6 inches of compacted gravel for drainage.
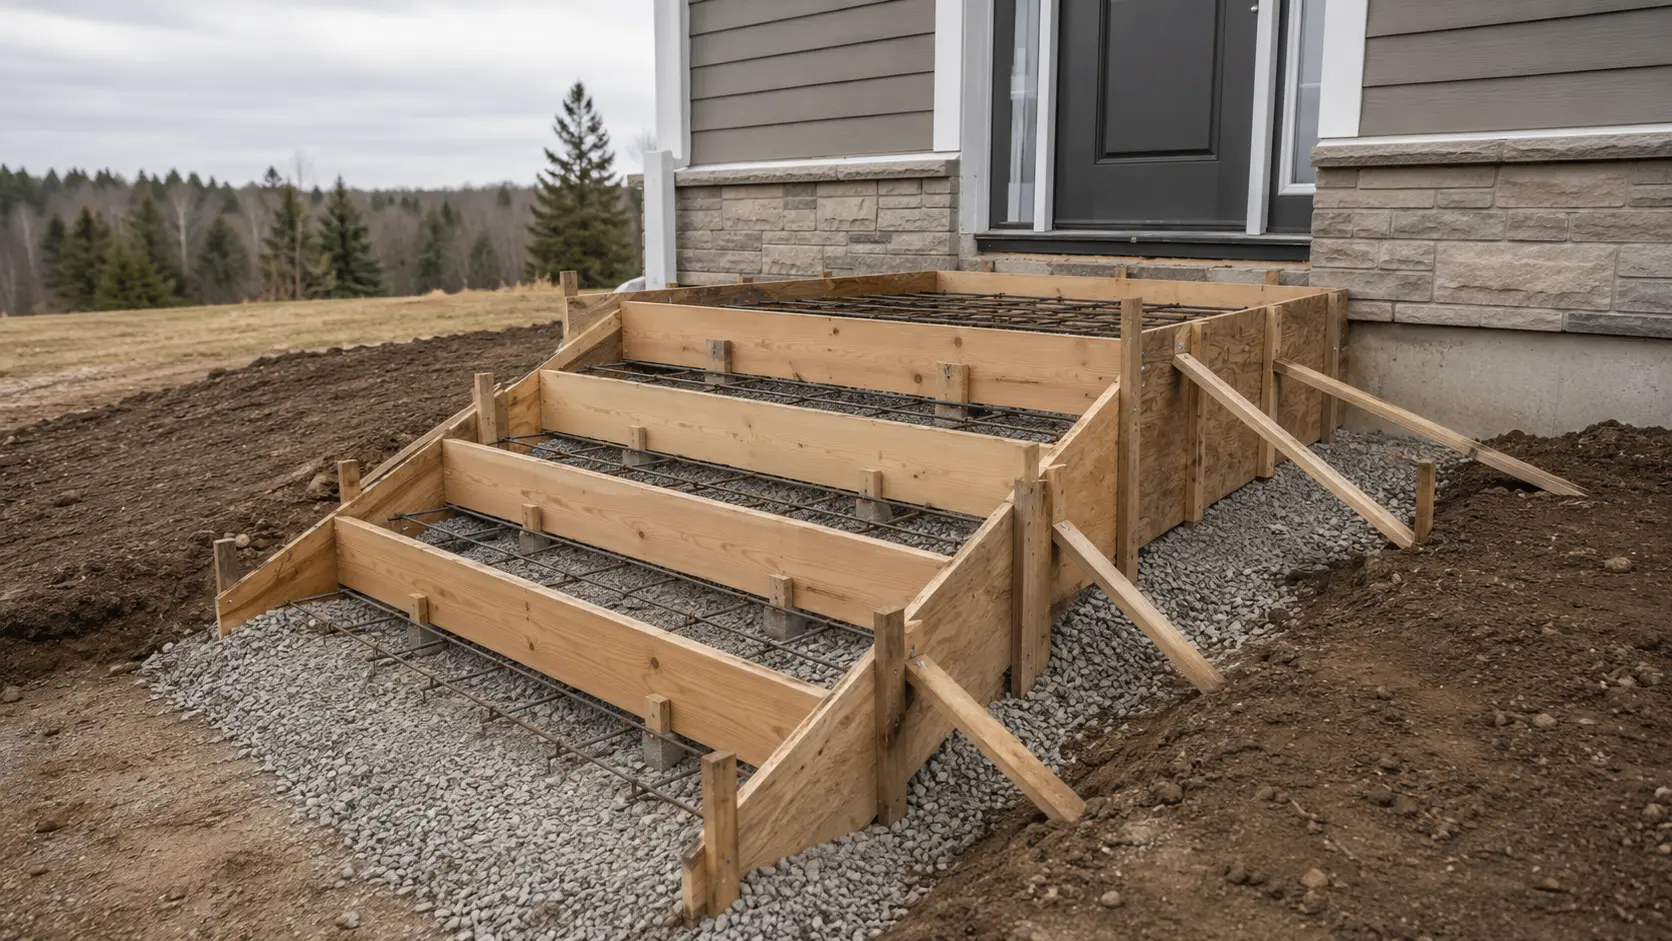
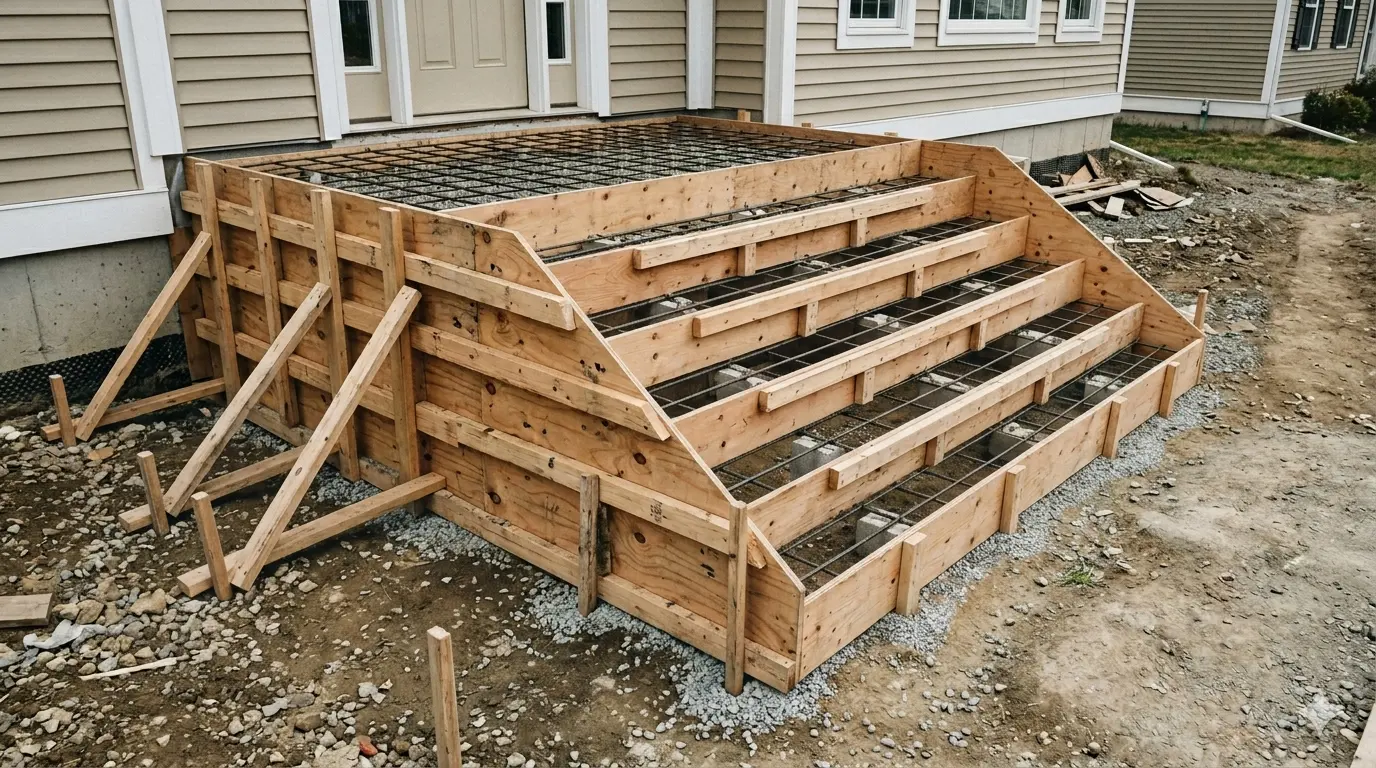
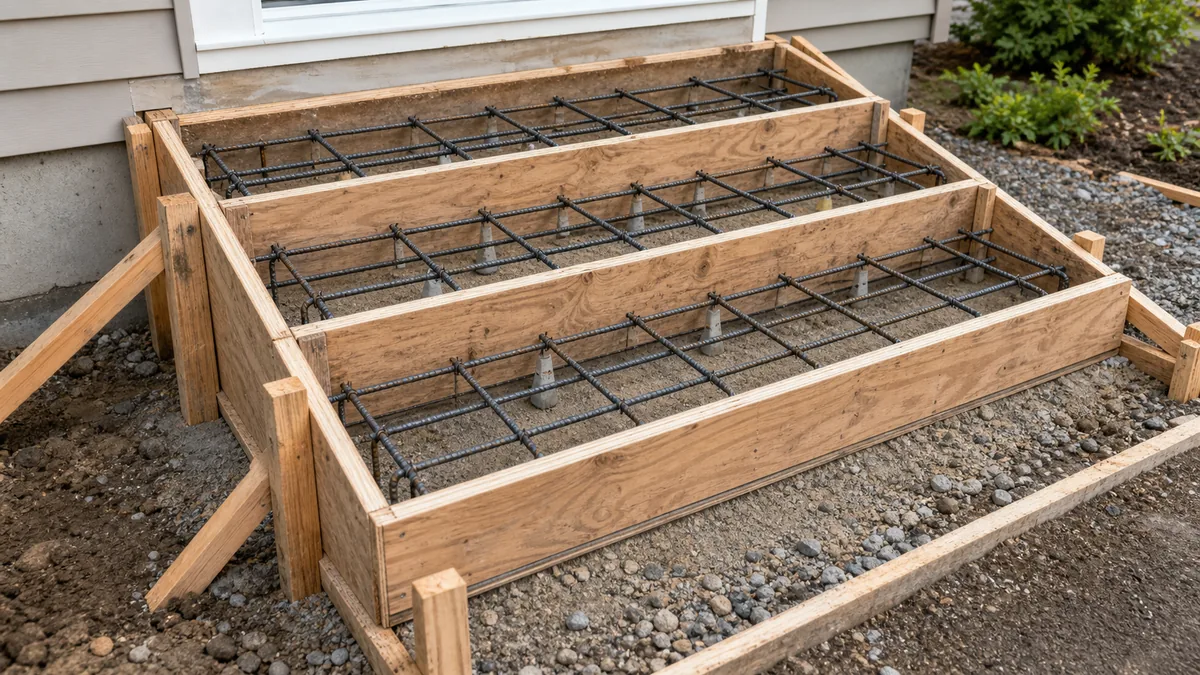
- Build the formwork. Use ¾-inch plywood sides set in a trench, staked every 12 inches. Rip 2×8 riser boards to the exact riser height, screw them from behind so hammering does not knock the form out of position, add a 2×4 strongback across each riser to stop bowing, and coat the inside faces with release agent.
- Place reinforcement. Tie #3 or #4 rebar into a 12–16-inch grid on chairs or dobies, keeping every bar at least 2 inches from any surface, and tie the cage into the adjoining walk or footing.
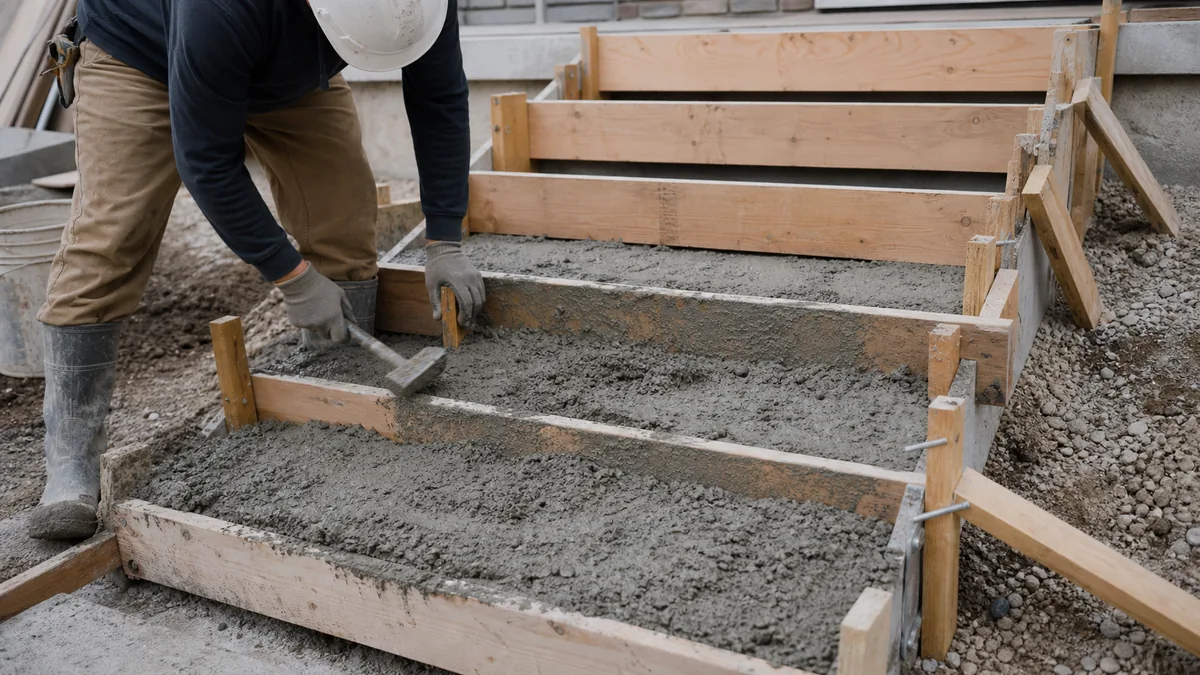
- Pour from the bottom up. Use a stiff mix — air-entrained at 5–7% air in freeze-thaw climates — and fill one step at a time from the bottom so voids do not collect at the base of the flight.
- Consolidate thoroughly. Poke the large faces with a shovel and tap every form board repeatedly with a light hammer; many light taps drive out far more air than a few hard blows.
- Screed and float the treads. Screed flush with the form tops (crown up for a slight drainage hump) and float once the bleed water leaves.
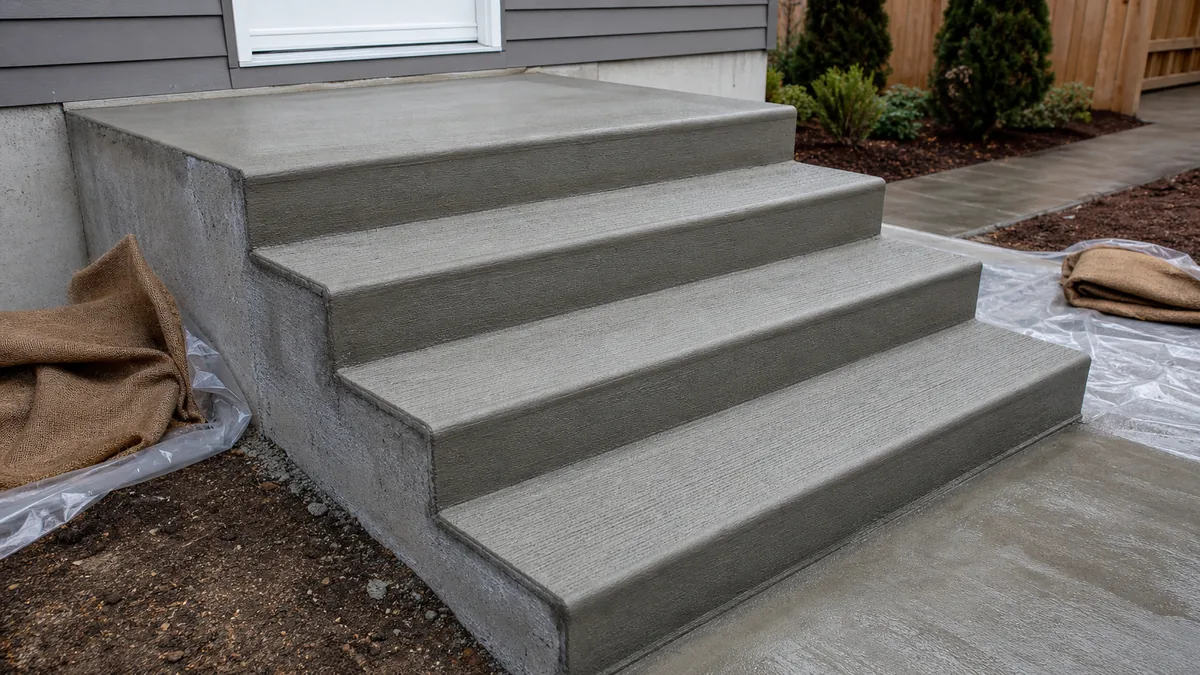
- Edge and broom. Run a ½-inch-radius edger along every nosing to resist chipping, then broom every tread for mandatory slip resistance.
- Strip riser forms at 24–48 hours. Remove the riser boards once the concrete stands on its own, fill small voids by "stealing the cream" from adjacent surfaces rather than adding water, and re-float the vertical faces.
- Cure 7 days and protect. Apply an acrylic cure-and-seal or keep surfaces damp under burlap or plastic for 7 days, barricade the stairs while they set, and keep deicers off for two years — use sand for traction.
Sources and further reading
Use this guide with the Pour Ready methodology page, stair details from the project documents, and the local code path that governs the stair.
- 2021 IRC Chapter 3 Building Planning for common residential stair and landing checks.
- ACI 318 official code page for structural concrete scope when concrete stair support moves beyond simple ground-supported planning.